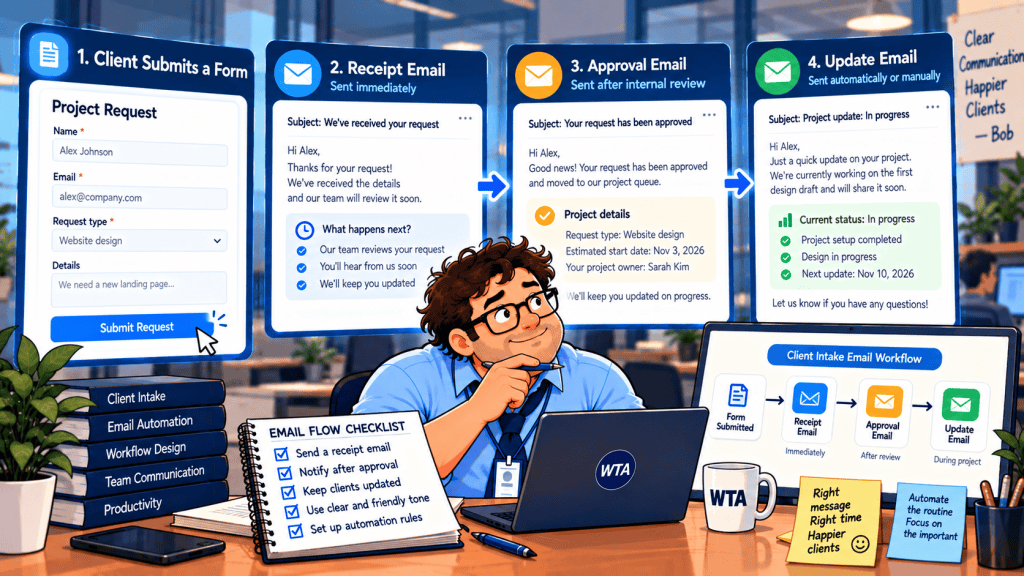
A client submits a request at 4:52 p.m. on Friday. The form says “Success,” and an automatic email says, “We’re on it.” The client assumes someone has accepted the deadline. On Monday, the team discovers the request needs a different scope and a quote. Nothing went missing, but the confirmation created a promise nobody had approved.
That is the difference between a client intake form confirmation email and an actual status update. A receipt proves the submission arrived. It does not mean the work is accepted, assigned, priced, or scheduled. Small service teams can avoid this ambiguity with three distinct messages and one reliable request record.
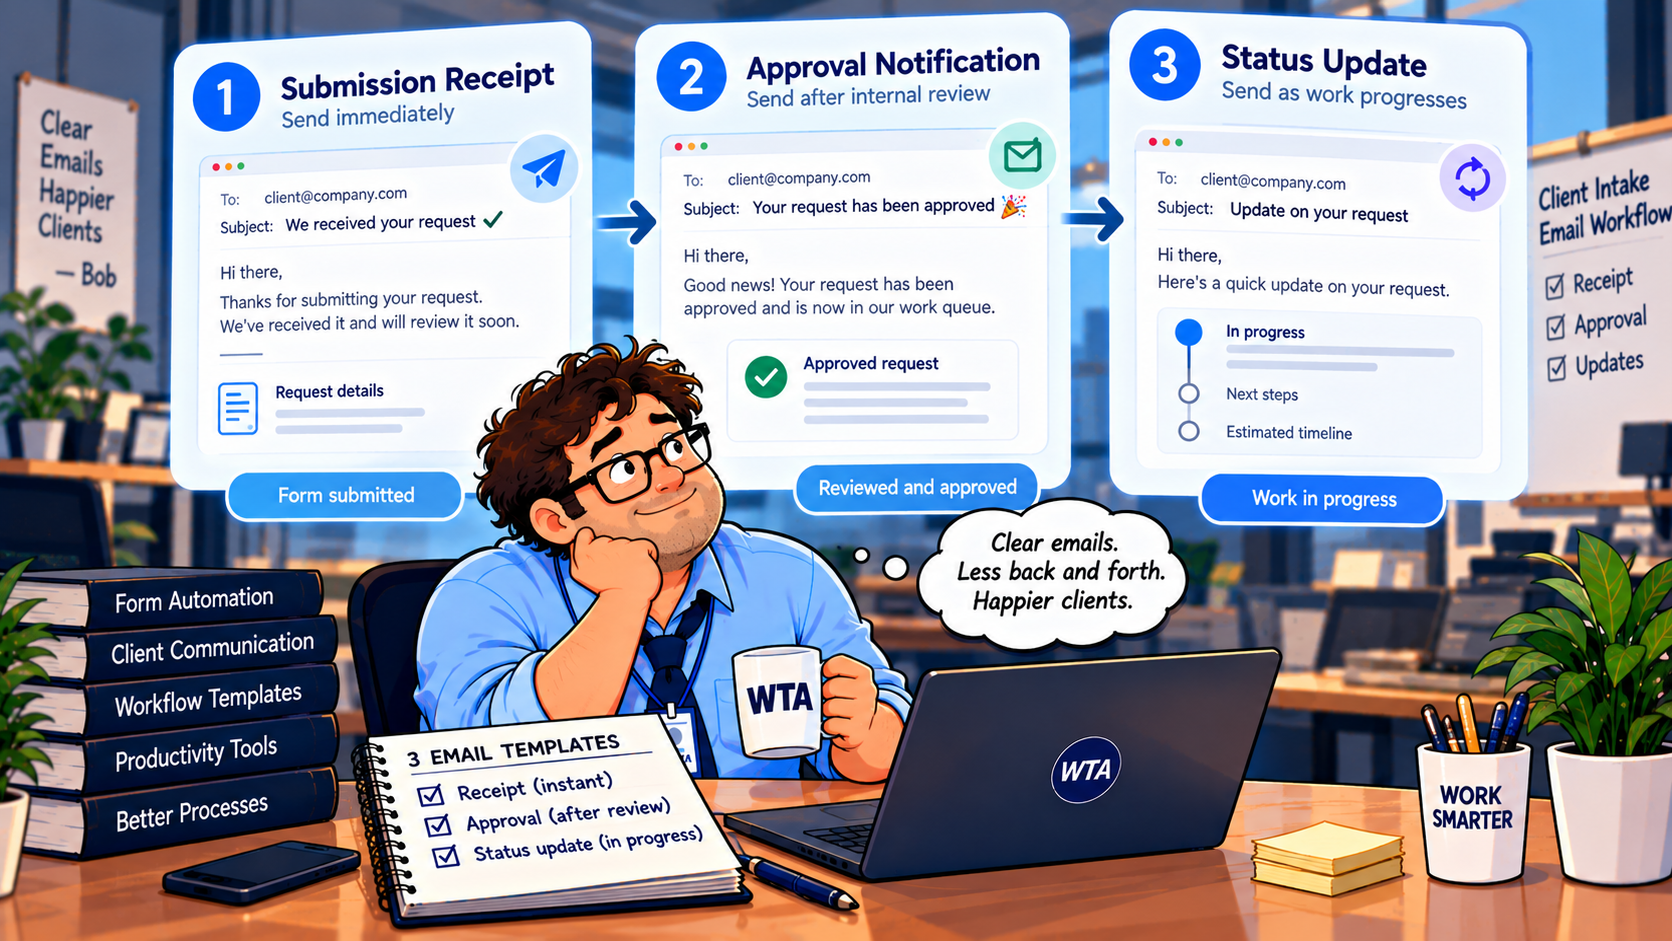
Quick answer: send a receipt immediately after a successful submission; send an acceptance, clarification, or decline after a person reviews it; then send updates only when the agreed status or next step changes. Each message should name the request, explain what it means, and identify what happens next.
Client intake confirmation emails: three distinct promises
The point is not to send three emails for every request. Some requests need a receipt and one decision; others need several meaningful updates.
Each message has a different trigger and a different claim. When those claims are mixed together, a simple form quietly becomes an unreliable commitment system.
| Message | Trigger | What it may safely promise | What it must not imply |
|---|---|---|---|
| 1. Received | A submission was saved successfully | We have the request and will review it | The work is approved or scheduled |
| 2. Reviewed | An owner makes an intake decision | Accepted, needs information, or declined | Every request is automatically accepted |
| 3. Updated | A material status or next-step change | What changed, who owns it, and when to expect the next check | A new deadline unless one is agreed |
If you have a service-level target, define what the clock measures. “We review requests within one business day” is not the same as “We finish requests within one business day.” Use a target only if your team can actually meet it, and account for time zones, holidays, and out-of-hours submissions.
Stage 1: acknowledge receipt without accepting the job
A useful receipt contains a recognizable subject, a reference number, a short description, the next review step, and one reply path. Avoid “Your project has started,” “Your deadline is confirmed,” and other phrases that accidentally turn an acknowledgment into an agreement.
Subject: We received your request [REQ-1042]
Hi [first name], we received your request, “[request title],” on [date]. Our team will review the details and let you know whether we can proceed or need more information. No delivery date has been confirmed yet. If you need to correct anything, reply to this email and include [REQ-1042].
That is deliberately less enthusiastic than “We’re on it.” It is also more useful. A reference number gives both sides a stable way to talk about the same request, especially when a client replies from a different email thread or submits a correction.
A receipt should be triggered by a confirmed saved submission, not by someone opening the form or clicking a button. If a downstream integration fails, the team still needs an internal way to see the original request and investigate. Do not make the client-facing receipt claim that a task was created in another app unless you verify that handoff.
Stage 2: send a decision, not another generic confirmation
After triage, a real person or an explicitly approved rule should move the request into one of three outcomes. Accepted means the team has agreed to handle it under defined conditions. Needs information means the next action belongs to the client or reviewer. Declined or redirected means the request is not entering the delivery queue.
Accepted: identify the owner and the next milestone
Subject: Request [REQ-1042] accepted — next step
We’ve reviewed your request and can proceed with [agreed scope]. [Owner/team] will coordinate the next step. We expect to confirm the schedule by [date], or will contact you if the scope changes. Please use [REQ-1042] when replying.
Notice that “we expect to confirm the schedule” is different from promising a completion date. If the schedule is already approved, replace that sentence with the actual agreed milestone. Do not insert a date simply because the template has a blank.
Needs information: ask one answerable question
Subject: One detail needed for request [REQ-1042]
Before we can assess this request, could you confirm [specific question]? We’ve paused the review until we have that detail. You can reply here; there’s no need to submit a new form.
That last sentence matters. Sending a client back to the original form may create a second request rather than updating the first. The safer pattern is to keep the existing request ID and attach the clarification to it.
Declined or redirected: close the loop
A polite decline should say what the team cannot take on, whether there is a better channel, and whether any action is needed. Silence after an automated receipt leaves the client believing the request is still being worked on. If a request is out of scope, make that decision visible.
Stage 3: update only when something meaningful changes
Progress emails should not be a stream of “still working on it” messages. They are most valuable at handoffs: the brief is approved, the owner changes, a blocker appears, a deadline is agreed, or the work is delivered. Each update should answer three questions: what changed, who acts next, and when the recipient should expect another update.
Subject: Update on [REQ-1042]: awaiting approval
Your request has moved to [status]. We completed [specific step] and need [named decision or material] before moving forward. [Owner] is coordinating the next step. We’ll check back by [date], even if there is no change.
For long-running work, a promised check-in can be helpful. For quick requests, it may be unnecessary. Choose a cadence your team can maintain, and make the “next update” date a team-owned field rather than a guess embedded in an email template.
Build one request record that controls every message
You do not need an elaborate CRM to do this. You do need a single source of truth. A task, database record, or ticket should store enough information to prevent the receipt, review decision, and delivery update from drifting apart.
| Field | Why it matters |
|---|---|
| Request ID + client contact | Connects replies and updates to the same submission |
| Received timestamp + source | Shows when and where the request entered the queue |
| Status + decision timestamp | Separates received from accepted, blocked, declined, or done |
| Internal owner + next action | Prevents an unassigned request from looking active |
| Client-visible next check | Supports a realistic update promise |
| Receipt sent + last status notified | Reduces repeat emails when automations retry |
Treat the request ID as a conversation key, not as a security token. Do not expose private project data through a public link that grants access merely because someone knows an ID. A public form receipt can contain the ID without exposing the full internal task.
If your intake travels through multiple systems, make one record authoritative. Our duplicate-safe Fillout → Airtable → Asana workflow explains why a new form submission and an edit to an existing request must be treated differently. The same principle applies to email: one request should have one current decision, even when the automation retries.
What Asana, ClickUp, Fillout, and Zapier actually provide
The three-stage model is a recommended workflow design, not a claim that every form builder includes three native email automations. Product capabilities, plan gates, and configuration differ. The distinctions below were checked against official documentation in October 2026.
Asana Forms: native tasks and an initial confirmation
An Asana Form creates a task in its project when someone submits it. Asana says the default name and email questions can be removed, but removing the email question also means the submitter will not receive the associated email confirmation. Advanced form options, including branching and custom confirmation messages, depend on plan. A form submission becoming a task is not itself evidence that a manager accepted the work.
If your team already works in Asana, start by deciding which task status means “reviewed” and who is authorized to set it. Our Asana Forms vs ClickUp Forms for client requests comparison covers the external-link and plan questions separately.
ClickUp Forms: submission tasks, with different form and message limits
ClickUp Forms can collect responses as tasks, but public sharing and advanced options depend on the plan. Its official availability table lists form sharing for Unlimited and higher, not Free Forever, and conditional logic for Business Plus and higher. The editable post-submission response message is documented for Business Plus and above. An on-screen end message is not an emailed acceptance decision.
Fillout: custom email workflows, but separate the triggers
Fillout documents custom email workflows for thank-you messages, conditional notifications, and delayed messages. That can handle the first receipt. But a delayed email cannot tell you whether anyone approved the scope. Use an explicit reviewed-status event for acceptance, and test the conditions and sender setup before going live.
If you are choosing between a form that creates native tasks and a dedicated form tool, read our Asana Forms vs Fillout for client requests guide. It covers the underlying intake architecture rather than treating email automation as a substitute for review.
Zapier Forms: visible confirmation and downstream actions
Zapier Forms can show a confirmation message, store submissions in a connected table, and trigger a Zap. Those are separate pieces: the screen message acknowledges a submission, while a Zap can carry data into another workflow. Use a separate decision event before sending an acceptance email. Our Airtable Automations vs Zapier for client intake comparison helps decide whether an extra automation layer is warranted.
Five failures to simulate before you turn the emails on
Do not test only the happy path. Create synthetic requests with clearly fake contact details, and check both the client-facing message and the internal record. A good test leaves evidence of what happened, not just a green check in the automation editor.
- Two submissions for one request: confirm whether the client receives two IDs or whether a documented matching rule links them. Never silently merge unrelated clients.
- A request that needs clarification: make sure “needs information” does not accidentally trigger an acceptance email or a second form submission.
- An automation retry: confirm a repeated event does not resend the same decision message; track a message type and version or sent timestamp.
- A failed downstream handoff: verify the original request remains visible and an internal owner is alerted; do not send “assigned” when assignment failed.
- A changed deadline or owner: confirm the next email reflects the approved new status, not an old template value.
Also check the basics that break trust quickly: reply-to address, email delivery, unsubscribe or communication preferences where applicable, accessible subject lines, and whether a client can infer another client’s details. Operational messages should collect and disclose only what is needed; applicable privacy and email rules depend on your jurisdiction and purpose.
Start small: one form, one owner, one review rule
For a three-person agency, a workable launch can be modest. Route every new request to a review queue. Send the receipt only when the submission is stored. Have one person review it during business hours. Move the record to Accepted, Needs information, or Declined, then send the matching message. Send further updates from changes to the authoritative request record, not from a calendar timer alone.
The most useful measure is not the number of automated emails. Track requests that received a receipt but never got a decision, decisions without an owner, and updates that went out with an incorrect status. Those exceptions tell you whether the workflow is doing its job. If the team cannot keep the review promise manually, automating the promise will not fix it.
WTA VERDICT
Do not let “form submitted” sound like “work approved.” For most small service teams, the safest client intake confirmation email workflow is receipt → reviewed decision → meaningful status update, all tied to one request ID. Automate the receipt first; make the acceptance boundary explicit; add more automation only when the team can verify the underlying state.
3-Line Takeaway
- Receipt: confirm arrival and set a review expectation, not a delivery promise.
- Decision: send accepted, needs-info, or declined only after a documented review.
- Update: communicate real status changes from one authoritative request record.
Sources checked October 24, 2026: Asana Forms help; ClickUp plan limits; ClickUp preview and response message; Fillout custom email workflows; Zapier Forms documentation. This article describes a recommended workflow, not a hands-on product test.

Leave a Reply